A good friend of mine has just downloaded Adobe Photoshop Lightroom Classic (which from now on I will refer to as Lightroom) and asked me for some advice. Another friend on the group chat, who is more familiar with Lightroom said it would be useful, so I thought it was worth posting on my blog. I am by no means a Lightroom expert, but having used it since version 1.0 in 2007 I am confident that I have got my workflow dialled. There are many ways to do things in Lightroom, this is just what I have found has worked for me over the last thirteen years of digital photography.
Import
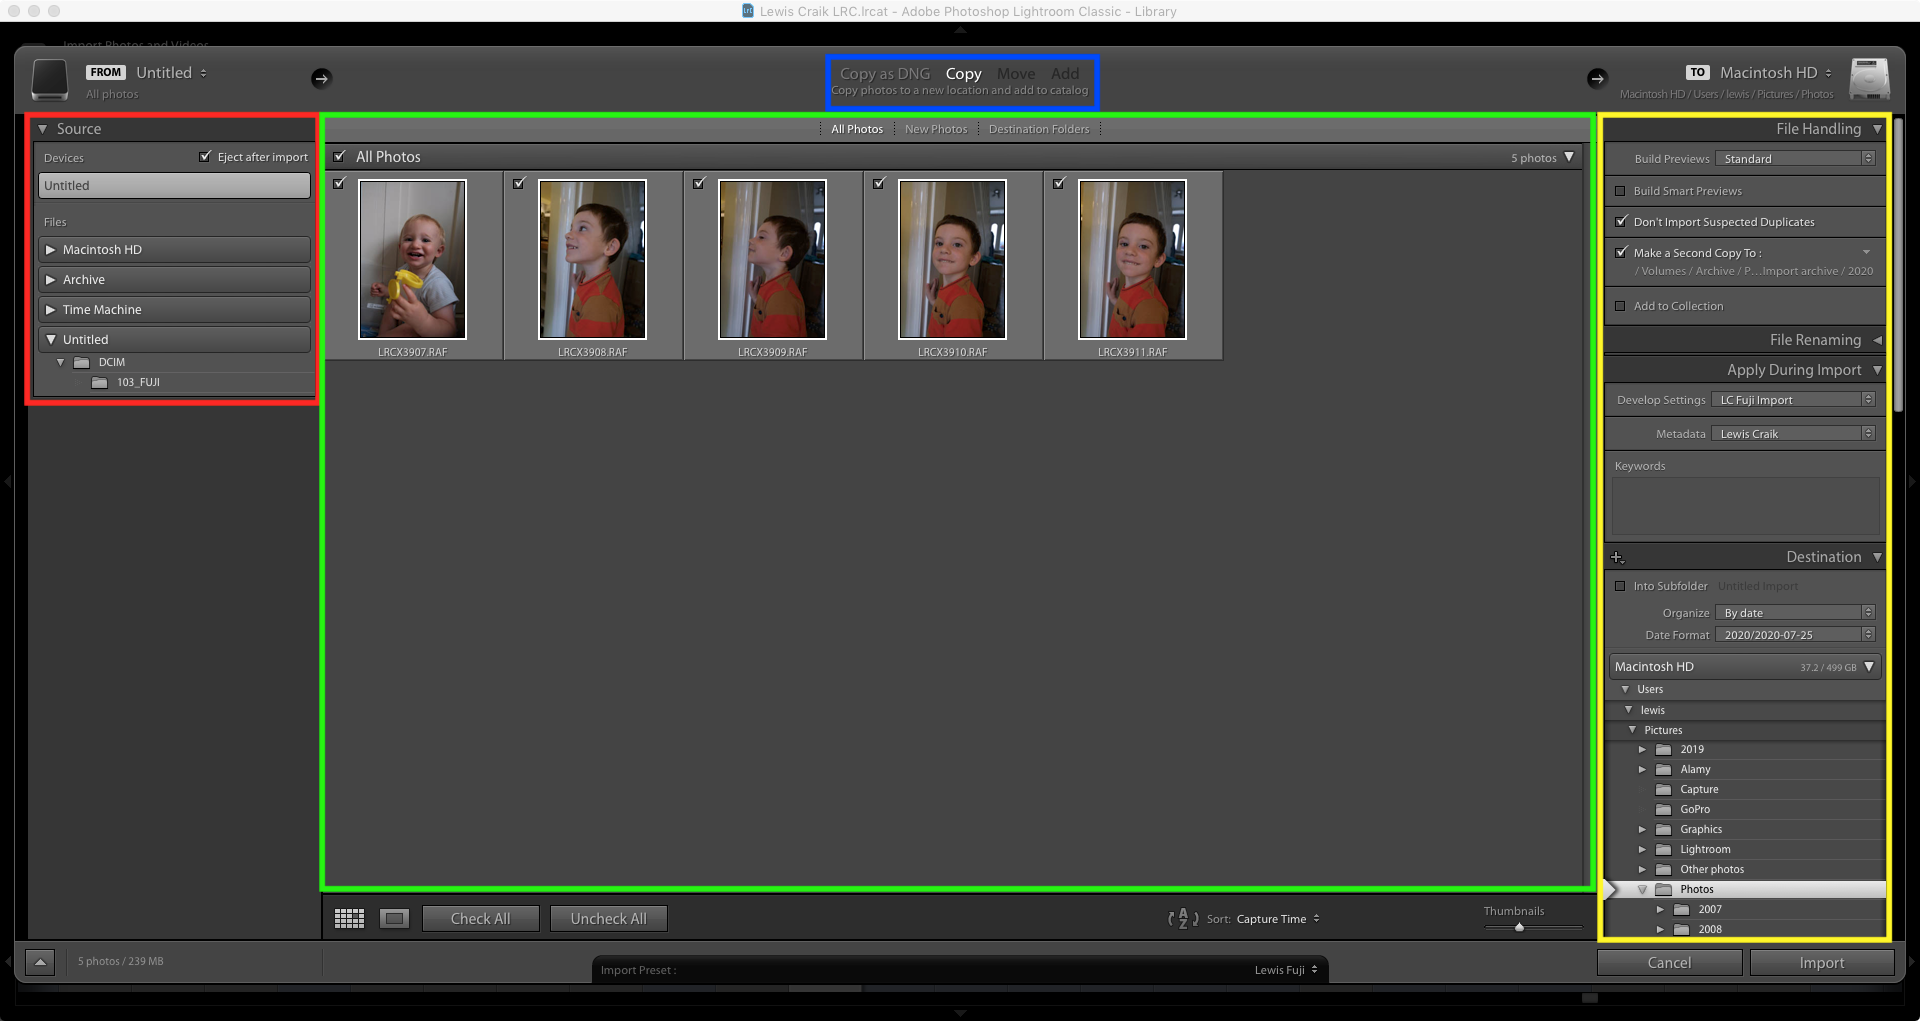
The import dialog is the starting point for Lightroom – you cannot do much without any photos! The good news is that once you have set up the import dialog how you like it, you barely need to make any further changes each time you import more photos.
I work through the dialog left to right, first choosing my source location (red area), which is almost always my SD card. In the middle section, which after selecting your source should be showing all your photos, the most important decision is between Copy as DNG/Copy/Move/Add (blue area) – this determines what happens to your source files. Copy is generally the best option to use, as explained in the next paragraph, (feel free to skip it if you do not want/need to know why). Immediately above the thumbnails (green area) I like to show “All Photos”, but “New Photos” can be useful, if for example you have forgotten to format your memory card. There is a checkbox at the top left of each thumbnail to select which images get imported – I like to import all of the images, then delete from the catalog when I have viewed the images in loupe view.
The copy options copy the files from your source, for example SD card, to the destination specified in the next step – I use these options most. I do not use “Move”, as that deletes your source files, I prefer to control when my files are deleted. “Add” does not do anything to your source files, simply pointing the Lightroom catalog to the source location – which I fine, until anything happens to the source location, for example ejecting your SD card… The difference between “Copy as DNG” and “Copy” is that the former converts any camera manufacturer proprietary raw files to Adobe’s DNG (Digital Negative) format – I used to use this option when I shot with Canon cameras, but since switching to Fuji I have been using the standard “Copy” option – as Adobe to not handle the RAF to DNG conversion particularly well, and I want to keep flexibility to edit with other tools. It is always possible to convert raw files to DNG using the Library > Convert to Photo to DNG… option at a later date, if you want to benefit from the marginally smaller file sizes and embedded metadata provided by DNG.
Now you have chosen where to import images from and which images from that location you want to import, the final section (yellow) is where you define how the images are imported. Working through this section top to bottom:
- File Handling: I build standard previews, if I had a more powerful Mac, with more storage space, I would go for 1:1 previews, but standard work well enough for me. As I store all of my files on the same device as my Lightroom catalog I do not build smart previews, this feature would be useful if you work on a laptop and store your library on an external drive. To me, the most important setting here is “Make a Second Copy To:” which I use to each of the files to an external drive, ensuring that whatever happens after import I have a copy of the original file. This is another reason why I select all of the images for import in the middle section.
- File Renaming: I do not bother with this, I prefer to rename files on export, when working in Lightroom the filename is not really used.
- Apply During Import: This is where you can start to speed up your processing! I have created presets to apply both my standard processing and metadata to each of the files. Over the years I have found that I like to add a touch of clarity/vibrance and apply the standard lens corrections. Since switching to Fuji I have also set it to apply the “Provia” film simulation, which my camera is configured to shoot with. You can configure your own presets in the Develop module to match your style, but I have shared mine for reference: Fuji/non-Fuji. The metadata preset adds my name/contact details/copyright statement to the files, so that they can be tased back to me if found online. If all files in the import are a set and have the same keywords, I will also add the key words at this stage.
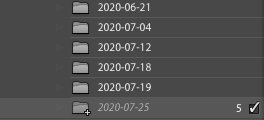
- Destination: This is where the imported files will reside on your system, if you chose to Copy/Move them. I have a specific folder for all of my Lightroom library images, although I let Lightroom organise them by date taken, so it automatically creates a YYYY/YYYY-MM-DD folder structure. If you scroll down and look at the section Lightroom will show you how many images will be added to each folder – in my example below all the photos were taken today, so go into the same folder.
Generally once configured, you will not need to change these settings again. So now, all you have to do now is press “Import” and wait for Lightroom to do its work! Depending on your computer spec and amount of files this could take a while! At this point I remove the SD card from my Mac, put it back in the camera and set all of the dials/setting back to my standard set up. I do not format the SD card until immediately before I use the camera next time, to give the peace of mind of an extra copy of the images.
Once your files have been imported in to Lightroom, it is important to note that you should only move/delete your image files from within Lightroom. This is the golden rule of Lightroom, as manipulating the files elsewhere can break the links to the files and cause all sorts of confusion.
Choosing Which Images to Process

Lightroom handily places your imported photos into a collection called “Previous Import”, which is where I prefer to work on them. My first job is to identify the “picks” and “rejects” – I do this in the loupe mode, with each image taking up most of the screen. The keyboard shortcut for loupe mode is “E”, or simply double click an image in grid view.
When marking picks and rejects, I use the P and X keys to speed things up, if you type capital P or X (or U for unflagged) the next image from the filmstrip is brought up, allowing you to move through a large collection of images quickly. I tend to do multiple passes – the first rejecting, with X, any obviously out of focus or poorly composed images. Any standout images get flagged as picks with P. After each pass I use CMD + backspace to remove all of the rejects from my library, and also “Delete from disk” when given the option. I then review the picks – have I got enough? Too many? All the shots I was after? Then depending on the outcome, I will loop through the remaining images until I am happy with my selection of picks, which I will then process and add image specific metadata, such as keywords and captions. Processing and exporting is a bit beyond the scope of this post, as they depend on your style and what the images are being used for…
Catalog Management
You would think that after exporting images you are done – but a bit of work post export can help keep your catalog (and disk drive) tidy and help you find images at a later date. In addition to the pick and reject flags, Lightroom has two other ways of marking images – colour labels and stars.
I use stars to denote the quality of the image:
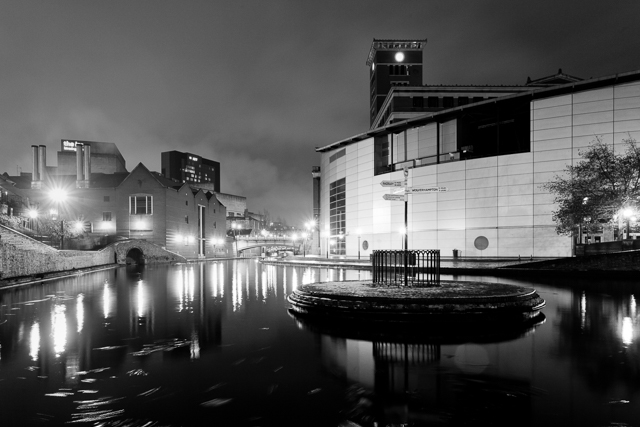
- 5* images are my very best work. The photo above of the canal roundabout is one of my 5* images.
- 4* images are my best work work in a genre, for example motorsport. These are generally the photos that appear on my portfolio website.
- 3* images are ones that I would like to keep in my library, usually ones I would like to look back on myself, rather than share.
- 2* images need some attention, usually they are images I have not had time to process.
- 1* images are images that I need to work on in Photoshop, I used to use it to identify images that needed to be merged in to HDR or panoramas, but since Lightroom gained this capability I have been using the 1* button less.
A top tip for applying star ratings is that you only need to press the appropriate number button 1-5 on your keyboard, or 0 to remove a star rating. You can search on star ratings on an equal to lower/greater than basis.
I use the colour labels to identify what an image has been used for after export:
- Blue means that the image is online somewhere, this blog, my Flickr etc.
- Yellow means that I have printed the image.
- Green means that the image has been both published online and printed, like the image above.
- Red images have been licensed elusively – red is a warning not to do anything else with the image.
- Purple images have been licensed on a non exclusive basis, such as images I have had published in magazines.
After applying ratings and colour labels to images, I then decide if I want to keep the unprocessed images in Lightroom or not. For images that I do decide to keep, I have set up a smart collection, which automatically collates all images over six months old with a 2* rating or lower and no colour label. I can then review this smart collection periodically, and delete any unwanted/unused images on the basis that if I have not done anything with them after six months, I am unlikely to do anything with them at all – however they were backed up at import if I ever need to get them again…
The metadata, colours, stars, keywords etc that I add in Lightroom, along with my regime of removing unused files means that despite thirteen years of photography, with all my files going in to Lightroom, I am able to find any photo that I need fairly quickly and, despite my ageing iMac the application still runs relatively well. I can see how a Lightroom catalog could end up in a complete mess, without proper planning and a strategy in place.
Fuji Camera Profiles
One of the things that I like most about having switched to Fuji are the colours. Whilst Lightroom does not quite match the Fuji jpeg colours, their camera profiles do come close, so I will explain how to apply the Lightroom Fuji profiles.

The profile browser is accessed from the four rectangles button in the “Basic” part of the Develop Panel, just above white balance – as highlighted by the yellow rectangle above.
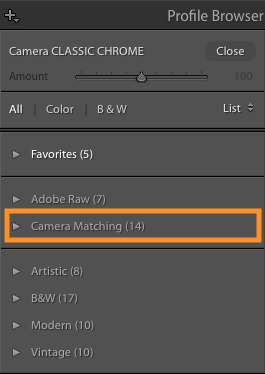
The section we are interested in is “Camera Matching”, for Fuji, this gives profiles for each of the film simulations available on your camera. I have favourited my most used (Provia/Acros/Classic Chrome/Astia/Velvia), so that they are easier to find in future. Although, as mentioned above, to make it even easier, I have created a preset to automatically apply the Provia simulation/profile to all Fuji images as I import them.
This has been a bit of departure from my usual blog content. It started off as a bit of a brain dump to help a friend, but I hope somebody has found it useful or interesting. Normal service, with photos of my boys, shall resume shortly!