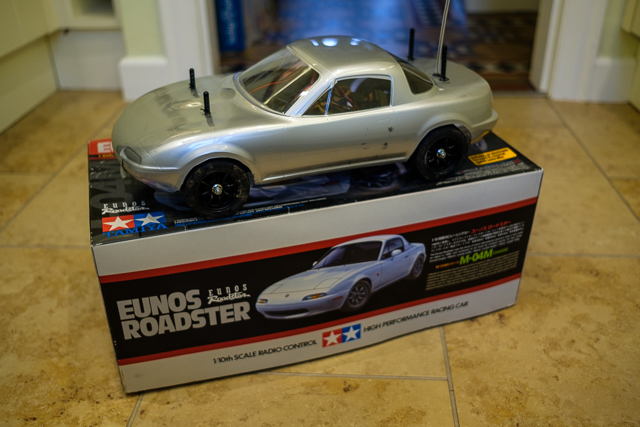
 One of my goals for 2020 is to rebuild my Tamiya 1:10 scale radio controlled MX-5 model up and running. After wanting a decent radio controlled car as a kid, I finally bought myself the Tamiya MX-5 model when I was a student in 2006, when I had a real version of the car. As work/studying/life in general got in the way the little MX-5 was put away in the loft, and transferred from loft to loft as I moved house three times. Then I found it when I was digging out my Scalextric set to show Owen and decided to rebuild it this year.
The plan is to split the rebuild in to three parts:
- Refresh the chassis – all the radio gear was rattling around loose, and I was unsure of the state of the rest of it. I also did not know what condition the electronic components were in.
- Tidy up the original body shell – when I originally did the build in 2006, I did not do a great job of painting and preparing the body shell. I also crashed it and put a split in the front bumper.
- Paint and prepare the spare shell to a high standard – due to the rubbish paint job and crash, I had the foresight to buy a spare body shell, which I have not touch yet. The idea is that I will try to do a really good job of the paint and decals, to make it look as much like my old car as possible! This body will be kept for looking good, as I would be gutted if I crashed it.
There is also a potential fourth phase, which would be preparing the MX-5 for racing, but that may not actually happen. This post covers the chassis refresh. As I tidy up the body shells I will update with further posts!
The first thing that I needed to do was to check the NiCad battery packs – they are known to degrade over time, and I did not expect them to be in good condition after fourteen years in the loft. The first surprise was that I found a yellow battery pack, that I had forgotten about, unfortunately when I connected it to the charger it was not recognised – not a good sign. The other (blue) battery pack charged up fine, and apreared to be holding voltage when tested with my multimeter. When I eventually got some charge into the yellow battery pack it did not hold it, so it will go into the battery recycling. At least I had one battery pack that I could use for my testing. When researched new battery packs, it seems that the technology has moved on significantly – NiCads, like I have, are no longer available, NiMH battery packs are a straight swap, but considered old hat. LiPo batteries, like those found in mobile phones/tablets are the current standard, but from what I can tell would mean replacing all of the electronics inside the car – so I will give that a miss!
Next, I had a thorough read of the build instructions, and soon discovered the parts list – and “hop up” parts list for upgrades, and decided that if I was stripping the car down, I should probably fit the metal bearings, rather than the standard plastic bushings. I also noted the exact consumables I would need – grease, tyre glue and servo tape (to stick down the radio gear). I started the strip down with the front bulkhead/suspension and found surprise number two – the metal bearings were already fitted! I took my shortened shopping list to FTD Models in Coventry, who were able to supply me with better quality generic products, for less than the equivalent Tamiya bits – result! Owen helped with rebuilding the front bulkhead – he has seemed really interested in this project!
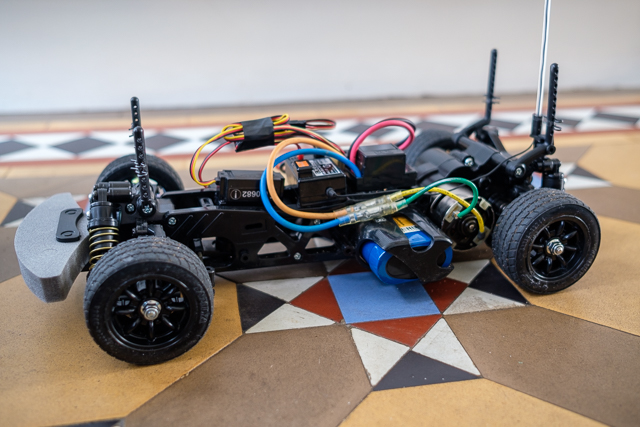 That evening Jen had some friends round for “cocktails and puzzles”, which meant that once the boys were in bed, I had a few hours where I would not be interrupted and could crack on with the rebuild – focussing on the rear part of the chassis, which houses the rear suspension, and drivetrain. To regrease the gearbox, differential and axles meant fully didassembling the rear of the car, but I got it fixed back together without any parts left over! Before fixing the radio gear back into the car, I tested that it still worked – which it did, so I was able to use the servo tape to stick the speed controller and radio receiver onto the chassis. Then, when Jen was out of the house, Owen and I were able to give the chassis (minus body) a brief test drive in the hallway at home. The test drive was successful, so I proceeded with the final steps of the rebuild – tidying the wiring and glueing the tyres to the rims. Glueing the tyres is something I had neglected to do when I initially built the car, as I did not have any tyre glue and I was eager to drive the car. Unfortunately I started doing the first wheel before watching a guide on YouTube, and learning that I should have trimmed the inner foam before fitting it. To avoid any handling imbalances, I did not trim the foam on the other rear wheel, the front wheels look much neater with trimmer foam though. With the chassis finished it was time to refit the body and take it for another test drive in the hallway, which swiftly turned into a shakedown at the Hearsall Common fair site, which was the nearest clear area of hardstanding I could think of.

Ever since I brought the box down from the loft, Owen has been really interested in the car, asking regularly when we would be able to drive it. He was surprisingly keen to help with the rebuild, even if it was just watching and handing me tools. When it came to the test drives at home he was really excited, even though the car was barely crawing along. Owen wanted to drive it properly, and as I was feeling confident in the car, I brought him along for the shakedown. As there was a risk that the car could fail after a few minutes we brought our bikes along to do some skills practice, so it would not have been a wasted trip if the car failed. Fortuantely it ran worked well! I let Owen drive, but he struggled to hold the controller, so we settled on Owen controlling the throttle whilst I supported the controller and did the steering. He was actually a really careful driver, keeping the speed sensible and following my instructions – impressive for a three year old! In fact, the only crashes happened when I was controlling the speed and driving too fast…
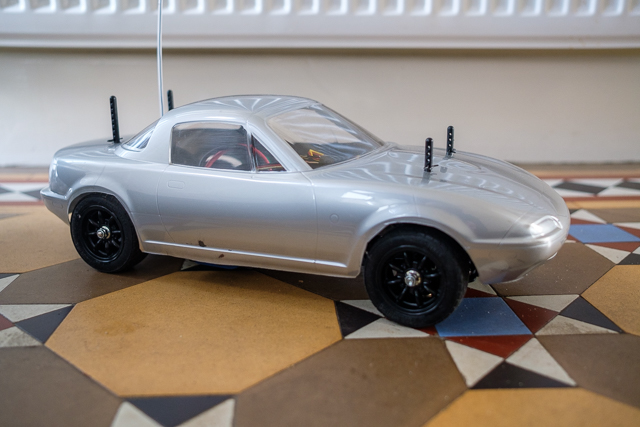 The car was fast and seemed less keen to just spin in circles than I remember. I needed to add some trim to the steering to stop the car veering left, but I should be able to correct that fairly easily by altering the steering arms on the car. The battery pack also lasted longer than I expected. The situation the car is in now is a lot like my real MX-5 was for the last few years I owned it – a good runner with a scruffy body! Fortunately it should be easier to tidy up the plastic body shell than it would have been to weld up all the rust on the real thing!