How I manage Images in Adobe Photoshop Lightroom Classic

A good friend of mine has just downloaded Adobe Photoshop Lightroom Classic (which from now on I will refer to as Lightroom) and asked me for some advice. Another friend on the group chat, who is more familiar with Lightroom said it would be useful, so I thought it was worth posting on my blog. I am by no means a Lightroom expert, but having used it since version 1.0 in 2007 I am confident that I have got my workflow dialled. There are many ways to do things in Lightroom, this is just what I have found has worked for me over the last thirteen years of digital photography.

Import
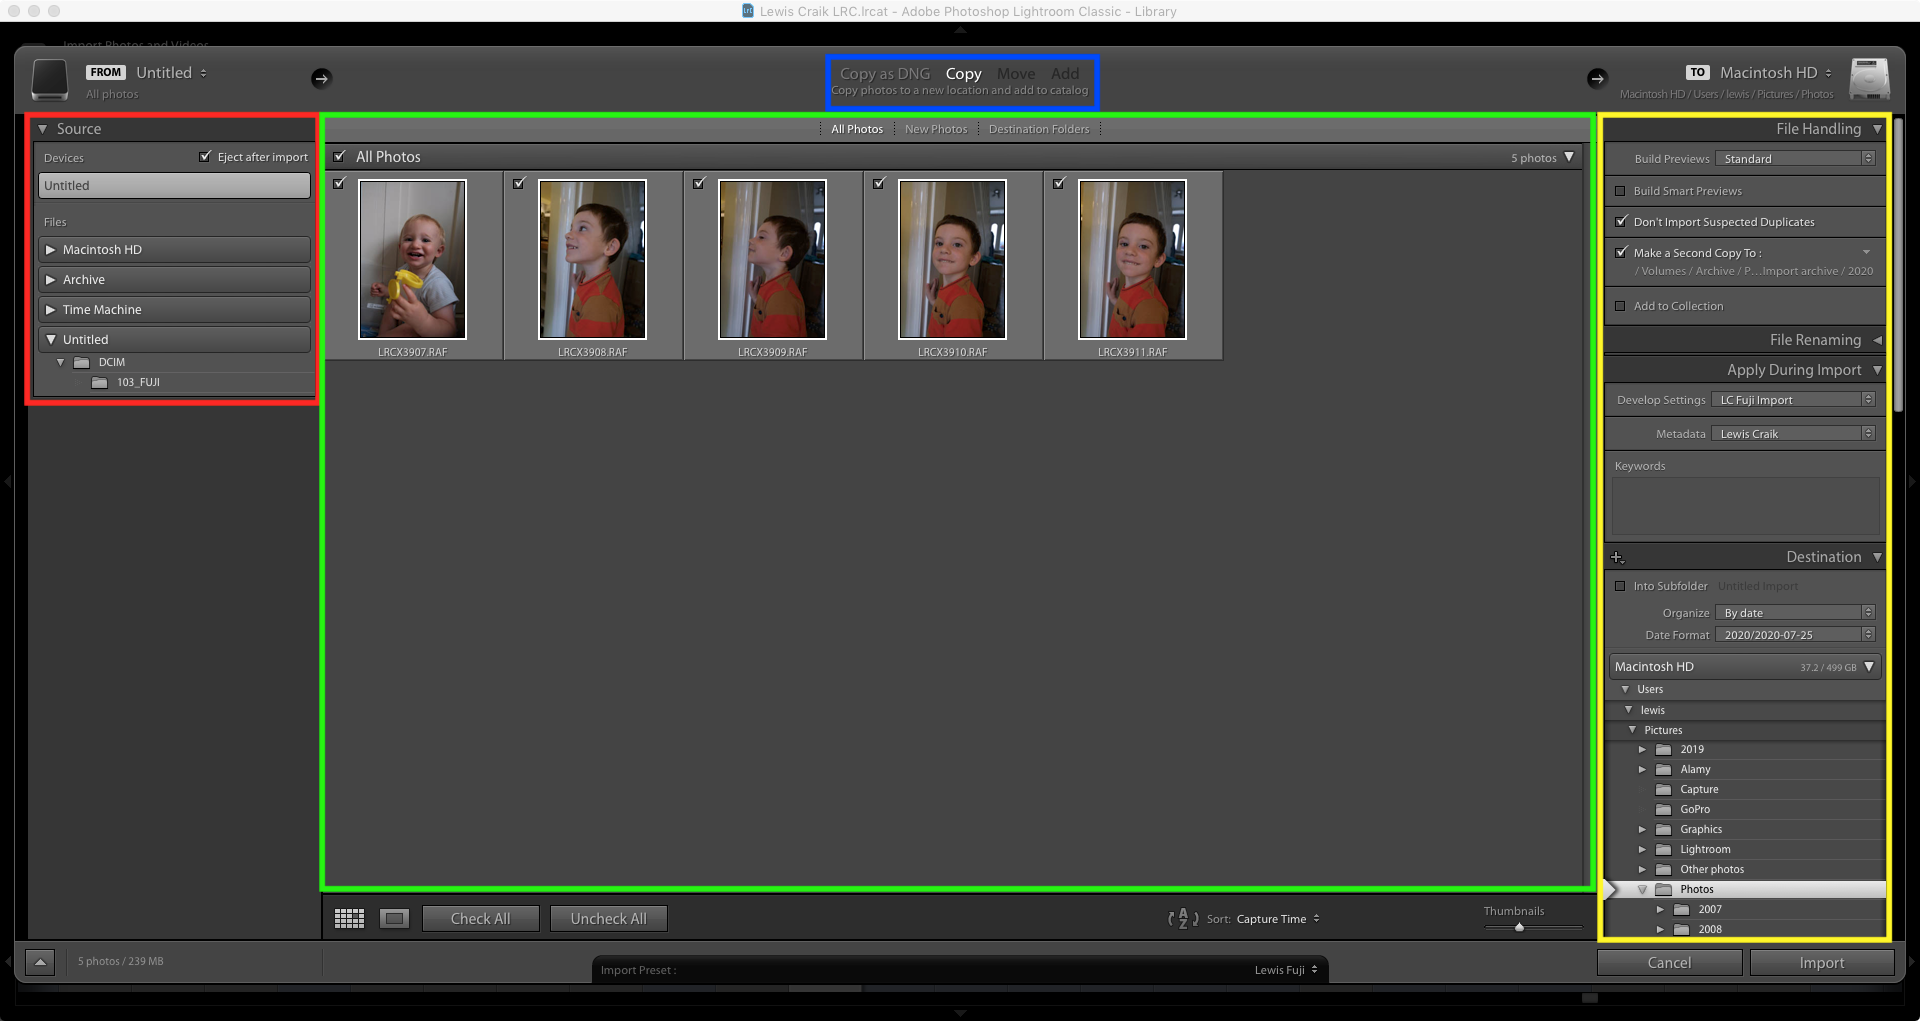
The import dialog is the starting point for Lightroom – you cannot do much without any photos! The good news is that once you have set up the import dialog how you like it, you barely need to make any further changes each time you import more photos.

I work through the dialog left to right, first choosing my source location (red area), which is almost always my SD card. In the middle section, which after selecting your source should be showing all your photos, the most important decision is between Copy as DNG/Copy/Move/Add (blue area) – this determines what happens to your source files. Copy is generally the best option to use, as explained in the next paragraph, (feel free to skip it if you do not want/need to know why). Immediately above the thumbnails (green area) I like to show “All Photos”, but “New Photos” can be useful, if for example you have forgotten to format your memory card. There is a checkbox at the top left of each thumbnail to select which images get imported – I like to import all of the images, then delete from the catalog when I have viewed the images in loupe view.

The copy options copy the files from your source, for example SD card, to the destination specified in the next step – I use these options most. I do not use “Move”, as that deletes your source files, I prefer to control when my files are deleted. “Add” does not do anything to your source files, simply pointing the Lightroom catalog to the source location – which I fine, until anything happens to the source location, for example ejecting your SD card… The difference between “Copy as DNG” and “Copy” is that the former converts any camera manufacturer proprietary raw files to Adobe’s DNG (Digital Negative) format – I used to use this option when I shot with Canon cameras, but since switching to Fuji I have been using the standard “Copy” option – as Adobe to not handle the RAF to DNG conversion particularly well, and I want to keep flexibility to edit with other tools. It is always possible to convert raw files to DNG using the Library > Convert to Photo to DNG… option at a later date, if you want to benefit from the marginally smaller file sizes and embedded metadata provided by DNG.

Now you have chosen where to import images from and which images from that location you want to import, the final section (yellow) is where you define how the images are imported. Working through this section top to bottom:

  • File Handling: I build standard previews, if I had a more powerful Mac, with more storage space, I would go for 1:1 previews, but standard work well enough for me. As I store all of my files on the same device as my Lightroom catalog I do not build smart previews, this feature would be useful if you work on a laptop and store your library on an external drive. To me, the most important setting here is “Make a Second Copy To:” which I use to each of the files to an external drive, ensuring that whatever happens after import I have a copy of the original file. This is another reason why I select all of the images for import in the middle section.
  • File Renaming: I do not bother with this, I prefer to rename files on export, when working in Lightroom the filename is not really used.
  • Apply During Import: This is where you can start to speed up your processing! I have created presets to apply both my standard processing and metadata to each of the files. Over the years I have found that I like to add a touch of clarity/vibrance and apply the standard lens corrections. Since switching to Fuji I have also set it to apply the “Provia” film simulation, which my camera is configured to shoot with. You can configure your own presets in the Develop module to match your style, but I have shared mine for reference: Fuji/non-Fuji. The metadata preset adds my name/contact details/copyright statement to the files, so that they can be tased back to me if found online. If all files in the import are a set and have the same keywords, I will also add the key words at this stage.
  • Destination: This is where the imported files will reside on your system, if you chose to Copy/Move them. I have a specific folder for all of my Lightroom library images, although I let Lightroom organise them by date taken, so it automatically creates a YYYY/YYYY-MM-DD folder structure. If you scroll down and look at the section Lightroom will show you how many images will be added to each folder – in my example below all the photos were taken today, so go into the same folder.
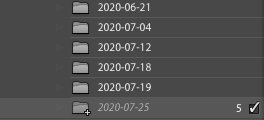
Generally once configured, you will not need to change these settings again. So now, all you have to do now is press “Import” and wait for Lightroom to do its work! Depending on your computer spec and amount of files this could take a while! At this point I remove the SD card from my Mac, put it back in the camera and set all of the dials/setting back to my standard set up. I do not format the SD card until immediately before I use the camera next time, to give the peace of mind of an extra copy of the images.

Once your files have been imported in to Lightroom, it is important to note that you should only move/delete your image files from within Lightroom. This is the golden rule of Lightroom, as manipulating the files elsewhere can break the links to the files and cause all sorts of confusion.

Choosing Which Images to Process
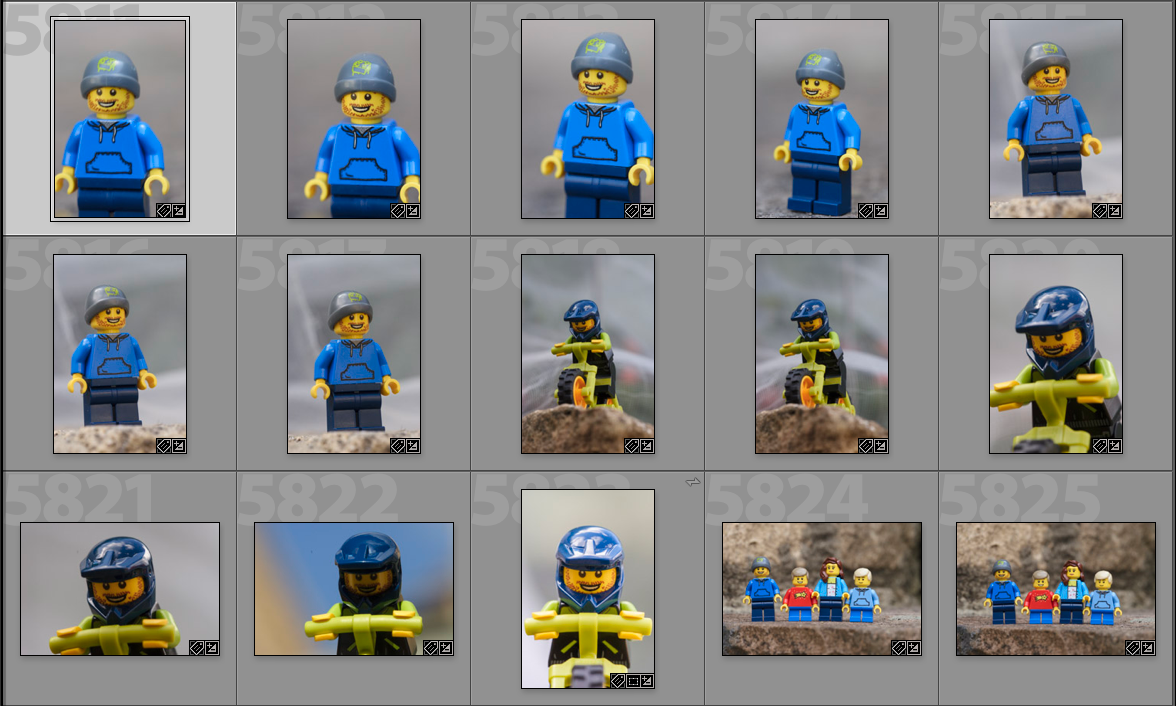
Lightroom handily places your imported photos into a collection called “Previous Import”, which is where I prefer to work on them. My first job is to identify the “picks” and “rejects” – I do this in the loupe mode, with each image taking up most of the screen. The keyboard shortcut for loupe mode is “E”, or simply double click an image in grid view.

When marking picks and rejects, I use the P and X keys to speed things up, if you type capital P or X (or U for unflagged) the next image from the filmstrip is brought up, allowing you to move through a large collection of images quickly. I tend to do multiple passes – the first rejecting, with X, any obviously out of focus or poorly composed images. Any standout images get flagged as picks with P. After each pass I use CMD + backspace to remove all of the rejects from my library, and also “Delete from disk” when given the option. I then review the picks – have I got enough? Too many? All the shots I was after? Then depending on the outcome, I will loop through the remaining images until I am happy with my selection of picks, which I will then process and add image specific metadata, such as keywords and captions. Processing and exporting is a bit beyond the scope of this post, as they depend on your style and what the images are being used for…

Catalog Management
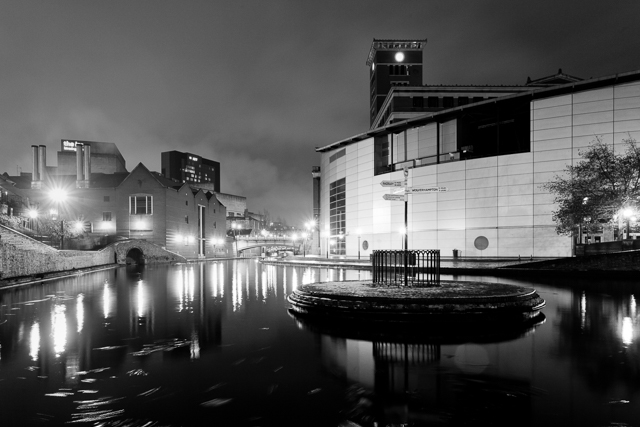
You would think that after exporting images you are done – but a bit of work post export can help keep your catalog (and disk drive) tidy and help you find images at a later date. In addition to the pick and reject flags, Lightroom has two other ways of marking images – colour labels and stars.

I use stars to denote the quality of the image:

  • 5* images are my very best work. The photo above of the canal roundabout is one of my 5* images.
  • 4* images are my best work work in a genre, for example motorsport. These are generally the photos that appear on my portfolio website.
  • 3* images are ones that I would like to keep in my library, usually ones I would like to look back on myself, rather than share.
  • 2* images need some attention, usually they are images I have not had time to process.
  • 1* images are images that I need to work on in Photoshop, I used to use it to identify images that needed to be merged in to HDR or panoramas, but since Lightroom gained this capability I have been using the 1* button less.

A top tip for applying star ratings is that you only need to press the appropriate number button 1-5 on your keyboard, or 0 to remove a star rating. You can search on star ratings on an equal to lower/greater than basis.

I use the colour labels to identify what an image has been used for after export:

  • Blue means that the image is online somewhere, this blog, my Flickr etc.
  • Yellow means that I have printed the image.
  • Green means that the image has been both published online and printed, like the image above.
  • Red images have been licensed elusively – red is a warning not to do anything else with the image.
  • Purple images have been licensed on a non exclusive basis, such as images I have had published in magazines.

After applying ratings and colour labels to images, I then decide if I want to keep the unprocessed images in Lightroom or not. For images that I do decide to keep, I have set up a smart collection, which automatically collates all images over six months old with a 2* rating or lower and no colour label. I can then review this smart collection periodically, and delete any unwanted/unused images on the basis that if I have not done anything with them after six months, I am unlikely to do anything with them at all – however they were backed up at import if I ever need to get them again…

The metadata, colours, stars, keywords etc that I add in Lightroom, along with my regime of removing unused files means that despite thirteen years of photography, with all my files going in to Lightroom, I am able to find any photo that I need fairly quickly and, despite my ageing iMac the application still runs relatively well. I can see how a Lightroom catalog could end up in a complete mess, without proper planning and a strategy in place.

Fuji Camera Profiles

One of the things that I like most about having switched to Fuji are the colours. Whilst Lightroom does not quite match the Fuji jpeg colours, their camera profiles do come close, so I will explain how to apply the Lightroom Fuji profiles.
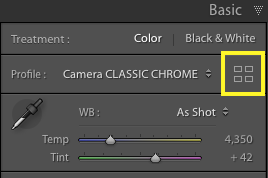
The profile browser is accessed from the four rectangles button in the “Basic” part of the Develop Panel, just above white balance – as highlighted by the yellow rectangle above.
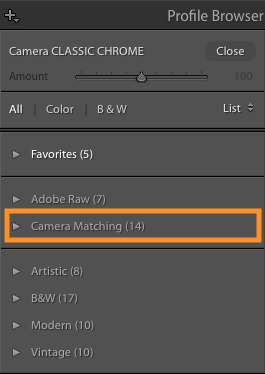
The section we are interested in is “Camera Matching”, for Fuji, this gives profiles for each of the film simulations available on your camera. I have favourited my most used (Provia/Acros/Classic Chrome/Astia/Velvia), so that they are easier to find in future. Although, as mentioned above, to make it even easier, I have created a preset to automatically apply the Provia simulation/profile to all Fuji images as I import them.

This has been a bit of departure from my usual blog content. It started off as a bit of a brain dump to help a friend, but I hope somebody has found it useful or interesting. Normal service, with photos of my boys, shall resume shortly!
Temporarily Switching Back to Canon

Last year I blogged about switching from my Canon 5D DSLR to a Fuji X-T2 mirrorless system (and also my experience one month on). Rarely in these situations do you get to switch back, however due to the struggles of trying to get a newborn and a toddler out the house (Henry needs loads of stuff and Owen is a typically stubborn two year old) I forgot to put my camera bag in the car when we visited my parents for Mother’s Day. I knew my Dad had his 5D tucked away, so I asked if I could borrow it, along with his 85mm f1.8 prime lens.

After trading in my Canon kit, getting to use an almost identical kit was a rare opportunity to compare the systems again. My first thoughts were “this is huge” and “how do I turn it on?”. Even after ten years shooting Canon, my muscle memory has switched to Fuji after only a few months – fear of learning a new system should not be a barrier to changing!

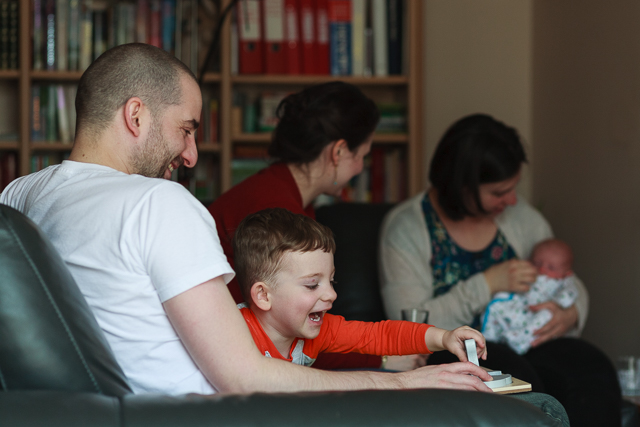
When I started shooting, the fact I was using an optical viewfinder passed me by. This surprised me, as seeing the result before pressing the shutter is one of my favourite things about mirrorless cameras. Maybe the X-T2 electronic viewfinder is good enough to be indistinguishable from an optical viewfinder? The biggest difference was the autofocus – it is rubbish on the 5D! It is slow, and the nine focus points are clustered around the centre of the frame – the Fuji is able to focus anywhere in the frame. Not having it set up to my liking with back button focus also hindered me – especially for photos like the one above, where I wanted to have the foreground sharp, but frame the shot to include some background interest.

Despite the points I made above the 5D still produces great images! Fuji are known for their colour science, but files from the 5D also seem to have a special quality to them. The shallow depth of field from the full frame sensor and fast prime lens is the one area I have had to compromise as I switched to Fuji – it is simply down to physics and camera/lens size is more important to me at the moment.

I have been asked to take some headshots for work in a few weeks, and after borrowing my Dad’s 5D I will be asking to borrow it again for the headshots. I am unsure if this would still be the case if I owned a decent Fuji portrait lens, such as the 56mm f1.2 or the 50mm f2, but given the kit I have access to the Fuji loses out this time.

Top Five from 2018

As is now customary, the PistonHeads.com Photography Forum had a thread to share your top five photos from the previous year, in this case 2018. As I had selected my five photos I also decided to share them on my blog, as I have done for 2017, 2016 and 2012.

I was surprised to open the curtains in Owen’s bedroom on morning to see a partridge perched on our fence (annoyingly nowhere near our pear tree). I grabbed my camera, opened the window and took a few shots before it flew off. The was the only photo I took with my old Canon 70-200mm lens last year – I love the quality of the image, but the fact that the lens did not even leave the house was part of my reason for part exchanging it towards my Fuji kit.

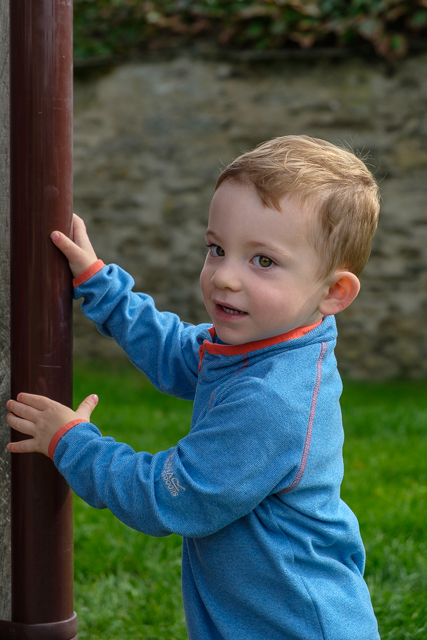
Jen and I love the Sandleigh National Trust Tea Room in Croyde, their cream tea is the best I have had! With an inquisitive toddler, the fact it is in a walled garden is great, Owen could explore on his own, still in the safety of the garden. The was one of the first portraits I took with my Fuji X-T2 (using the kit lens) and I was really pleased with how it came out.

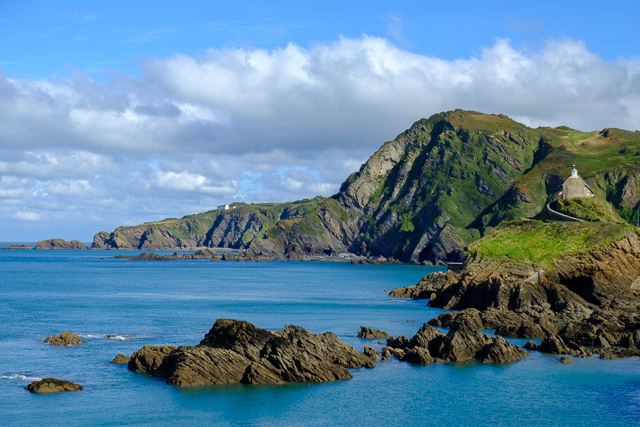
Another shot from our trip to Croyde, although this was taken from the Capstone Parade in Ilfracombe. It was the first real landscape shot I took with my X-T2 – and ideal for trying out the Velvia film simulation.

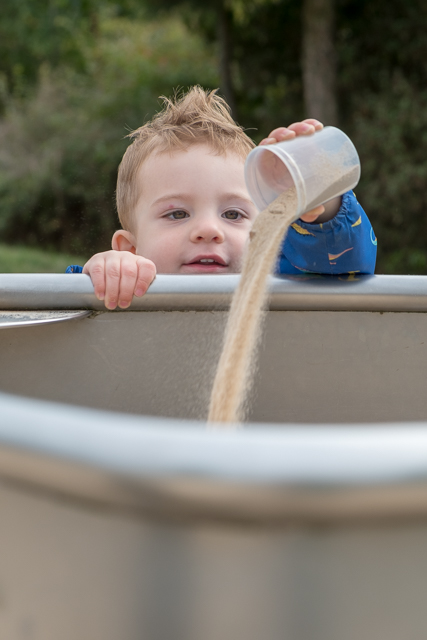
Since swapping my heavy Canon camera gear for a lighter Fuji set up, I am more likely to have my camera with me. In the past I would not have taken my camera for an excursion to the playground, but the little Fuji is great for this sort of trip out and means I can get photos like this one of Owen! He was playing hide and seek in this little cabin, so I set up the shot and waited for him to pop his head out. I really feel that Owen’s personality is captured here.

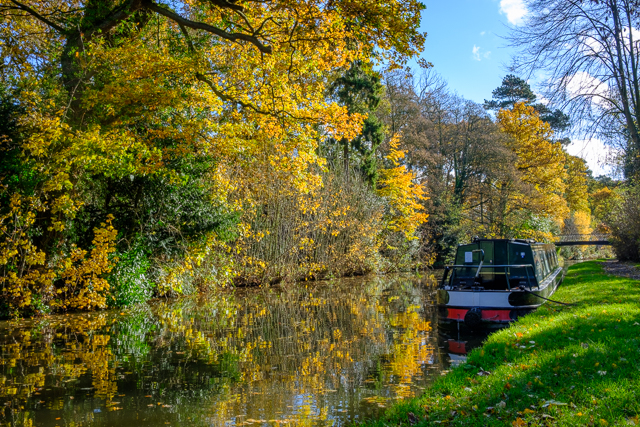
I posted this photo from the Trent and Mersey Canal just after taking it, but it made my top 5 because I like the colours and the reflections.

Autumn Colours on the Trent and Mersey Canal

Recently I realised that although I spend a lot of time at Cannock Chase, I only ever see the mountain bike trails, and vowed to explore some more – ideally with my camera! This weekend I had to pick up an eBay purchase so I decided to kill two birds with one stone and have a photography stop on the way home – actually I killed three birds with one stone, as I gave my Toyota MR2 a good run out too! The weather even played ball, as it was one of those sunny, crisp autumnal mornings. The previous day I had mentioned to Jen that I thought the autumn colours were particularly pretty this year. Maybe it is down to the nicer than usual weather (or global warming)?

I stopped right at the northern edge of the Cannock Chase AONB, in a village called Great Haywood. I’d chosen the location because there were two canals, the Staffordshire and Worcestershire Canal and the Trent and Mersey Canal, in addition to the River Trent. The area nearest to where I had parked was actually the most photogenic, especially with the autumn colours reflecting in the water. It was a great way to break up a journey and something I am going to try to do again in future.

Softplay Portrait

I grabbed this photo of Owen in the softplay at Rock Up in Birmingham. Jen and I had taken him there so that he could show Jen his climbing skills. However, knowing that there was softplay and toy trucks that he could be playing with, Owen didn’t want to do any climbing and spent the session in the softplay.

At first Owen was the only child in the softplay so I took the opportunity to join him in the ball pit with my camera. This resulted in the photo above, which is one of my favourite portraits. I would love to say that I set up the lighting and coordinated Owen’s t-shirt to the walls, but once I had spotted the shot I just had to quickly crank the ISO up on my camera, as it was pretty dark, and capture the best expression from Owen.

Shot with: Fuji X-T2 and 18-55mm lens at 1/40s, f4.0 at ISO 3200, processed in Lightroom CC Classic.

Switching to Fuji – One Month On

It has been a month since I swapped from my Canon full frame DSLR to my Fuji X-T2 so I thought I’d put down some more detailed thoughts, incase anyone else is considering the switch.

The main point is that it has got me excited about photography again! This may just be the new kit effect, however the smaller/lighter camera is also opening up more options for me. There also seems to be a lot of excitement around mirrorless cameras at the moment, especially given the announcements at Photokina the other week – you know something is becoming mainstream when even the BBC is reporting about it!

The first real test for the X-T2 was the family holiday to Croyde, this gave me a great opportunity to shoot a lot and get to know the camera. Most of the photos I took were of Owen – it is handy having your own mini, almost tame, model that you can take around with you! This meant the auto focus mode got a lot of use! Going from 9 auto focus points on my old Canon, to 91 on the Fuji was simpler than it sounds, once I had got the hang of the various modes. At first I was using the wee joystick on the back to select individual focus points – revelling in the ability to place the focus point almost exactly where I wanted it. That was until I discovered the face detection setting – when activated the camera sets the focus point on the human face nearest to the centre of the frame. It seems pretty reliable and is certainly quicker than manually selecting focus points, especially useful when your subject is a wriggly two year old!

Before I was fully confident with the face detection setting I took the time to study the other autofocus modes and set the camera up as if face detection didn’t exist. I have set up the rear command wheel to choose the size of the focus area. The standard way to enter this mode it to press the joystick, then select with the wheel – I have set the press of the command wheel to enter the mode, to speed up this process. I have the rest of the autofocus settings allocated to three of the “D pad” buttons, as I feel that autofocus is one area where I will be changing settings frequently. I have also set the “AF-L” button on the rear of the camera to be “AF-On”, replicating the back button focus feature that I used on my Canon DSLRs. However unlike Canon, you cannot manually focus in autofocus modes; you can however autofocus in manual focus mode…

Since getting back from Croyde I have tried some still life photography at home, mostly borrowing Owen’s toys after he has gone to bed. This has given me a chance to experiment with manual focus. I have found the auto focus useful get focus into roughly right area before tweaking with the manual focus ring on the lens. Focussing manually is so much easier than on a DSLR, as Fuji have a few features to help you:

  1. Focus check – as soon as you move the focus ring (in manual focus mode) the image in the viewfinder/on the rear screen is magnified allowing you to check your focus in greater details. You also can use the joystick to move the zoomed in area around the frame, for when you are focussing on something away from the centre of the viewfinder.
  2. Digital split image – the viewfinder image is split in three, where they line up is the area in focus. This reminds me of borrowing my Dad’s old Nikon FM2, a fully manual film SLR, which to the day is still the best manual focus system I have ever used. Unfortunately the Fuji still isn’t as good as the old Nikon.
  3. Focus peak highlight – which highlights the in focus high contrast images in a bright colour in the viewfinder/on the screen. I find this easier to use than the digital split image, especially in combination with the focus check feature.
  4. Distance indicator in the viewfinder/on the screen – show you the distance you are focussing on, including a depth of field indication, which changes with aperture.

Having the camera mounted on the tripod for the still life photos gave me a chance to experiment with controlling the camera over wifi, using the Fuji app on my iPhone. Unfortunately the app isn’t as user friendly as the camera, and I found it pretty restrictive. For instance I couldn’t work out how to get from shutter priority to manual control and even with the drive mode switch for the camera set to “Bracket” it would only take one photo, instead of the three I expected it to take. In the end I switched the wifi off and used an old mechanical release cable I had left over from my film photography days.

The only other problem that has arisen from swapping camera system is that Lightroom, the software I’ve used to edit images since 2007, doesn’t work brilliantly with Fuji raw files. This is something that is well known, and was a concern of mine before switching, but I had done some testing and not had a problem. However when I was working on the photos from Croyde I noticed a few worm like artefacts, which weren’t present in the jpeg files from the camera. Capture One, an alternative program to Lightroom, has recently announced that they now support Fuji cameras, I’ve had a quick dabble and they seem to handle the raw files significantly better than Lightroom. However there are other downsides, so this is something I need to investigate further.

When I traded in my Canon kit it was only worth enough to swap for the X-T2 camera body and 18-55mm “kit lens”, which is actually a pretty good lens! However this left me lacking a fast prime, a telephoto lens and a flash gun. So I have been trying to sell things on eBay to fund at least a fast prime lens, ideally before a trip to London at the beginning of December (it turns out that shrinking my camera gear has made most of my camera bags redundant, including some very nice/expensive FStop Gear bags). I will probably go for the 23mm f2 lens, which should be ideal for fitting to the camera for bike rides. I also need to buy a bigger and faster SD card – the one I am using is almost ten years old. I got a shock when I looked up the price of the UHS-II cards recommended by Fuji, I’ll likely get a 32GB card, which makes me feel old – I remember buying a 32MB CompactFlash card  for my first digital camera – a Canon Digital IXUS v2. I wonder where that is now…

Switching to Fuji

After eleven years using Canon DSLRs for my photography, I have swapped to a Fuji mirrorless system. It literally was a swap too – I walked into my local camera shop with a bag of Canon kit and walked out with my new Fuji X-T2 and 18-55mm lens!

The main reason behind the change is that in the last few years my lifestyle and priorities have changed and a heavy DSLR camera doesn’t fit in with my life in 2018. I’m not going out on photography adventures with my Dad anymore, Jen and I aren’t travelling as much as we were and my motorsport photography days are long gone! The Canon Eos 5D which I bought as a “temporary stop gap camera” in 2010, just wasn’t being used. It was too heavy/bulky to carry around. Especially when I am on a bike or out with Owen, and other than working and sleeping that is all I seem to do these days!

On the rare occasions I was using my camera I was only taking the camera and 24-105mm lens with me, to keep both kit and faffing to a minimum. On checking my Lightroom catalogue I had only taken one picture in 2018 with my 70-200mm f2.8 lens. I had been looking a a more advanced compact camera to replace my Canon S90, but my long term plan had been to get a new full frame Canon DSLR. However, given the amount of use I couldn’t justify it. Then I started to notice a lot of my photographer friends moving to mirrorless systems. With both Canon and Nikon announcing new mirrorless ranges recently the tide seemed to be turning towards mirrorless, so I decided to ignore my misgivings about electronic viewfinders and do some investigation…

Sony seemed to be the popular choice; I liked the idea of full frame sensors, and had heard a lot of good things about image quality. Then I checked the price – way out of my league! The Canon Eos M series was more reasonably priced, but I got the impression that they were aimed at amateurs, especially the range of lenses, probably too much of a step down from my 5D and L series lenses. Whilst looking I came across the Fuji X-T2 and thought it looked good, compact and well built, but too expensive, especially for a cropped sensor camera. However the seed had been sown. My search then brought me to the Fuji X-T20 – the X-T2’s baby brother, and its cousin, the X-A3. They were more in my price range and shared the same sensor/auto focus system as the X-T2, but crucially were within budget! I read a lot of reviews and convinced myself that Fuji with manual control dials on top of the camera and well built lenses was the mirrorless system for me.

Then it dawned on me – we were off on holiday in a few weeks time, a week in Croyde would be the perfect opportunity to get to know a new camera system! I sent details of my current kit to a dealer to see if the numbers would work – fortunately they did! Now all I had to do was decide which Fuji camera to buy, I preferred the layout of the X-T20 but the features of the X-E3. The only way to make a decision was to get to a camera shop to try them out. Whilst waiting for an opportunity to visit a camera shop, Fuji announced the X-T3. It looked perfect, except it was way too expensive for me, and in any case wouldn’t have been available before my holiday. However, it did mean Fuji reduced the price of the X-T2, just about bringing it into my budget! I now had three cameras to decide between. The main attraction of the X-T2 was the better build, including weather sealing and even simpler controls than the smaller X-T20. The downside was that I would only be able to afford one lens initially. By the time I got to the camera shop I had pretty much decided on the X-T2, deep down I knew that I if went for the cheaper model, I would either end up wanting to upgrade or breaking it whilst out on my bike. Therefore buying the more expensive X-T2 was actually the cheaper option. The camera just felt “right” in my hands, I didn’t need to try the X-T20, I was taking the X-T2 home!

As is usually the way with these things, I didn’t get to use it over the weekend, I certainly didn’t want to risk taking it to the Peak District with me. Especially as I haven’t got any protection for it – all my existing camera bags are set up for full frame DSLRs, so the little Fuji is just rattling around it them. Other than a few test shots at home, my first proper go with it was taking some headshots at work – no pressure then! After eleven years using Canon DSLRs I can change anything on them instinctively, and whilst the Fuji controls are intuitive, I struggled a bit. The zoom ring being the opposite way round to Canon, is going to take some getting used to. However, the electronic viewfinder was awesome, I could see what the photo was going to look like before I took it and the shooting information was all there too. I really don’t know why I was so against them previously!

Since then, I have been tweaking the settings to my liking and practicing on my tame(ish) model – Owen! Jon Caz’s guide was a particularly helpful starting point for settings, as there is a lot more to configure than on my old cameras and to be honest I am still getting used to them. We took Owen to get his haircut in Rugby, so I knew we would be going to the GEC recreation ground after – Owen loves the sandpit and mechanical diggers there! With Owen entertained, I was able to concentrate on taking some photos of him and trying out different settings. I particularly liked the one at the top of the post because of the expression on his face. Jen even used the camera to get some good pictures of Owen and I playing on the mechanical diggers, she noted how much lighter the Fuji is than my old set up.

I had read about people having issues processing Fuji files in Lightroom, this was a concern for me as moving away from Lightroom would be a much bigger change for me than changing camera system. My friend Graham sent some raw files from his X-T2 for me to try in Lightroom, I was able to get results I was happy with. However it has highlighted that I need to revisit some of the new features in Lightroom, especially the “Profile” section of the Develop Module, but also the sharpening controls. I had the same experience with the photos of Owen, I’ve been able to get photos I like, but possibly not as good as they could be.

The main thing though is that switching systems has got me interested in photography again! Instead of finding excuses to leave the camera at home, I’m finding reasons to take it with me!

Top Five from 2017

At the start of each year the photography forum on PistonHeads.com encourages users to share their top five photos from the previous year. It is a good opportunity to revisit my photos and share some that may not otherwise have made it into a blog post.

Here are my top five from 2017:

Owen looked so cute in the Woody outfit, it was when he was just starting to crawl and he thought the game was to crawl towards me and grab the camera.


When we were in Croyde I had a free morning where I was able to sneak out for some photography. This panorama was taken from the spot where I proposed to Jen, and is my favourite view anywhere. Click through to Flickr to see a larger version.

This was taken on the front camera of my iPhone, so won’t win any best photograph awards, but I love having a photo capturing all three generations. I know Owen likes it too, as my parents have a print of it in their house and he always points at it, exclaiming “Daddy” and “Papa” – he hasn’t learned to say grandpa yet, so calls my dad Papa.

Taken with my GoPro on holiday in Cyprus, I love the colours on the underwater part.

I just happened to have my camera in my hand when Gill brought Jen’s birthday cake into the room, so was really pleased that I managed to capture this.

I have also posted my top five from 2012 and top five from 2016.

Top five from 2016

I have just posted my contribution to the “Your Top 5 From 2016” thread on PistonHeads.com photography forum. as with my top 5 from 2012 I thought it would make a good blog post.

Owen in Weymouth – this was taken, and processed on my iPhone and is the background on my phone.

Owen at home – Owen doesn’t always have his tongue out I promise! Part of the triptych I posted last week.
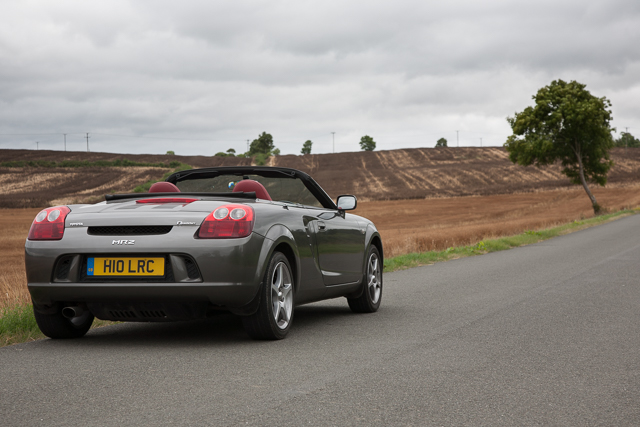
MR2 Sunday Drive – This photo just makes me want to get out and drive my MR2!
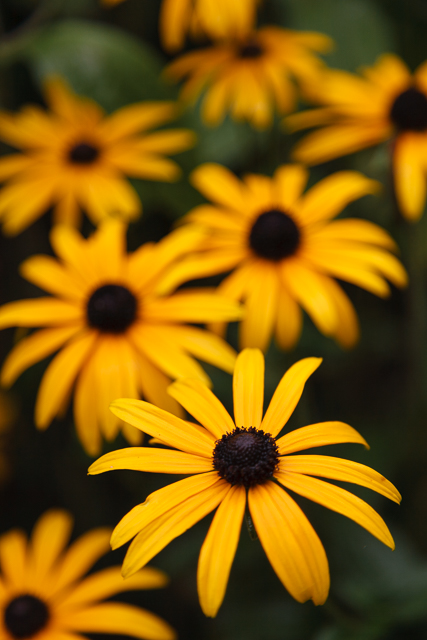
Rudbeckia – I only rediscovered this image whilst looking through Lightroom for my top 5 pictures. It was taken at Charlecote Park, when Jen and I hired a classic FIAT 500 for our first wedding anniversary.
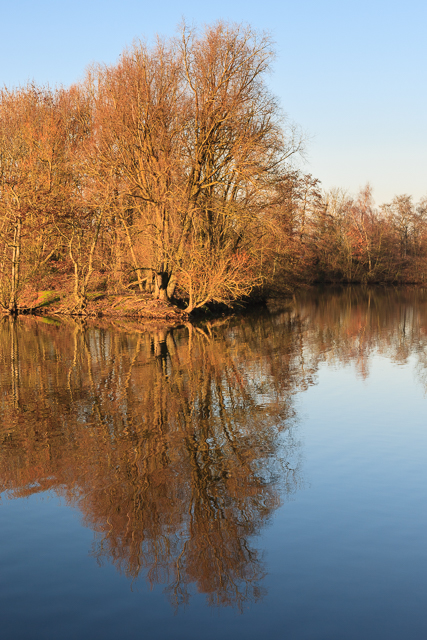
Ryton Reflections – I blogged about this image last week, I really loved the winter light.